
How to make a player map with fog of war
A player map shows only what the characters know. In Loremapper you paint fog of war over the rest, keep seeing through it yourself, and export a version for the table, a virtual tabletop or a campaign wiki.
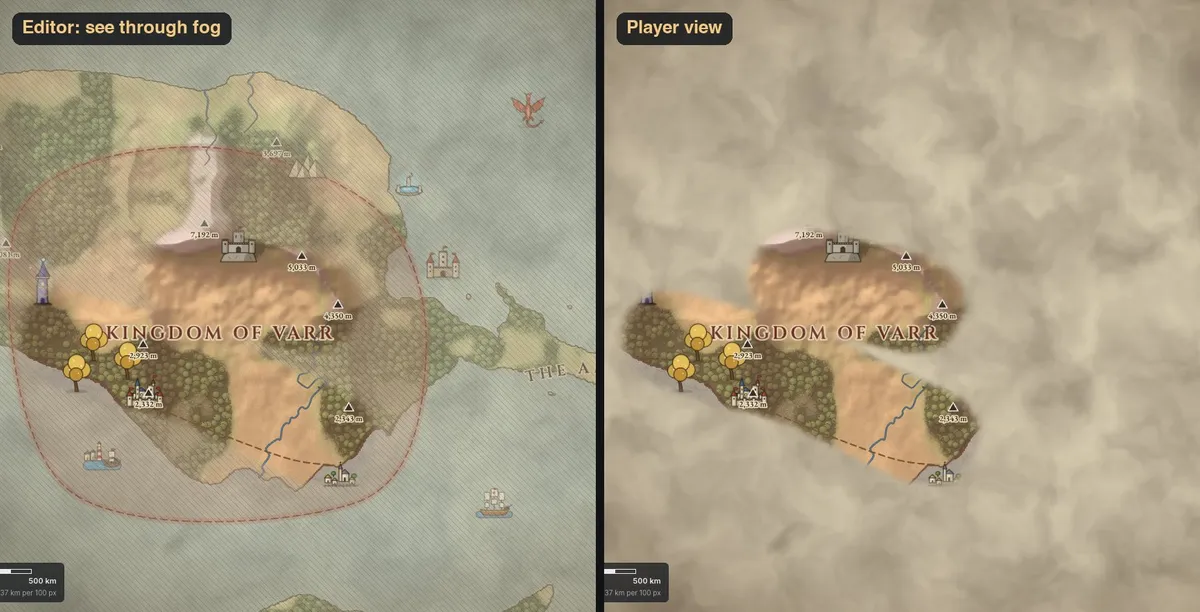
Steps
- Open your campaign map. Open the editor with the map of your setting, or generate one. Place the towns, roads and places the story needs first: fog hides them from the players, not from you.
- Choose the Fog of war tool. Press X, or pick Fog of war in the toolbar. The brush has two modes: Hide paints fog over land, Reveal clears it.
- Cover the whole map. Press Cover entire map to hide everything at once, then switch the brush to Reveal.
- Reveal what the party knows. Paint with Reveal over the places the characters have seen. Opacity sets how dense the fog is: at 50% the players see the land through a haze. Hold Shift or Alt to switch between hiding and revealing while you paint.
- Check what the players will see. The top bar switches between See through fog (for you, while editing) and Player view (the map as the players will see it).
- Export the player map. Open Export → Map image, set Fog of war to Revealed areas only (player map), choose the area and width, and press Export PNG. Export once more with Complete map for yourself.
- Reveal more after each session. As the party travels, reveal more with the brush and export a new player map. The map is saved in your browser; a project file (Export → Editable project) keeps a full backup.
Good to know
- Fog is only on the image you export for players; the map itself keeps everything.
- Exports go up to 12,288 px wide — enough to print or zoom in on a virtual tabletop.
- Distances are real: the Measure tool (U) tells how far the next town is.
Next
See Loremapper for D&D campaigns, generate a continent to play on, oropen the editor.